Our cleaning crew often gets asked when cleaning tiles in houses, ‘How to remove tough stains from tiles?’ It’s a genuine question, and from what our technicians share, the majority of homeowners ask this because they’ve already tried dealing with stains that have dried or set in without concrete results.
A coffee spill left overnight that darkened the grout, grease splatters near the stove that hardened over time, or hard water deposits that built up after months of daily use; these are the situations that owners commonly share with our technicians.
Even if you are getting professional tile cleaning done, DIY cleaning plays a crucial role in keeping your flooring clean. Hence, we decided to share some useful tile stain removal methods based on insights from our skilled tile cleaning team.
But before we get into the details of how to clean dirty tiles with stains on them, let’s have a peek at the stains that are found regularly on tile floorings.
Common Stains Found When You Remove Tough Stains From Tiles
Households face daily spills, food splatters, and water drips that seem harmless at first. But once these residues settle into grout lines or dry on tile surfaces, they transform into stubborn stains that are tough to remove.
Here are some of the stains that are found frequently:
Coffee & Tea: Dark pigments seep into grout, leaving brown discoloration. Common in living areas and kitchens.
Grease & Oil: Kitchen splatters harden over time, creating sticky marks. Mostly found on kitchen tiles near stoves.
Food Dyes: Curry, turmeric, wine, and sauces leave stubborn color stains. Frequent in kitchens and dining areas.
Hard Water Deposits: Mineral buildup causes cloudy patches and chalky residue. Typical in bathrooms and laundry areas.
Rust Marks: Metal furniture legs or bathroom fixtures leave reddish stains. Seen in bathrooms and living areas with metal fittings.
Soap Scum: Layers of residue form in showers, dulling tile shine. Common in bathrooms and shower surrounds.
Grout Discoloration: Dirt, mold, and moisture penetrate grout lines, turning them dark. Occurs across kitchens, bathrooms, and entryways.
Organic Growth Stain Marks: Common in damp bathrooms, the moisture enables mold or mildew growth, leaving black or green patches.
Stain Behavior on Different Tiles
Our experts explain that no tile surface is immune to stains. A spill that barely marks glazed porcelain can etch natural stone or sink deep into grout. That’s why it’s just as important to understand how stains interact with different flooring materials as it is to know the stain itself.
Here’s a table that helps you get a clear picture of how stain behavior changes across different tile types.
| Tile Type | Stain Behavior |
|---|---|
| Ceramic | Protective glaze resists stains, but grout lines absorb coffee, tea, and food dyes. |
| Porcelain | Glazed porcelain rarely stains, but soap scum and hard water marks can appear. Unglazed porcelain absorbs dyes, grease, and rust. |
| Natural Stone (Marble, Travertine, Granite) | Porous and sensitive to acids. Wine, food dyes, and rust can cause discoloration or etching. |
| Vinyl / Linoleum | Resists mild stains, but strong dyes, grease, and organic growth can leave marks. |
Key note: Grout lines are not tiles, but because they are porous cement joints between tiles, they absorb stains faster than the tile surface itself. Coffee, grease, and moisture often settle into grout, making it the most vulnerable part of any flooring system.
5 Key Tips on How to Remove Tough Stains From Tiles Effectively
Once you know about how common stains react with the flooring, it becomes easy to proceed with cleaning. However, a proper DIY plan is needed to clean and remove stains from tile floors. Normal mopping, or random use of cleaning solutions and blotting, won’t help.
Below are some tips shared by our technical team that help you follow a structured process to remove tough stains from tiles:
Tip 1. Identify the Stain Type
To use proper tile stain removal methods, you need to recognize whether the stain is organic, mineral, rust, or grout-related. This helps pick the right solution from the start, saving time and protecting your tile finish.
Once you know what you’re dealing with, the outcome stain removal gets easier, as you’ll know how it reacts with your tile flooring.
Here’s how you can recognize:
- Organic stains: Coffee, tea, liquid spills, food spreads, grease, oil, etc.
- Hard water (mineral) deposits: Appear as a chalky or white layer.
- Mold or mildew growth: Dark patches, residue buildup, or lingering musty odors.
- Rust stains (metal deposits): Reddish or brownish marks are visible.
- Grout discoloration: Visible color fading, dark streaks, and a yellowish appearance.
Tip 2. Pre-Treatment (Apply Solution)
Once you’ve pinpointed the stain, apply the cleaning solution directly to the affected area. Allow the solution to sit for 15 to 30 minutes, giving it time to penetrate and loosen buildup. The cleaning remedy does the heavy lifting, setting the stage for easier and more effective scrubbing.
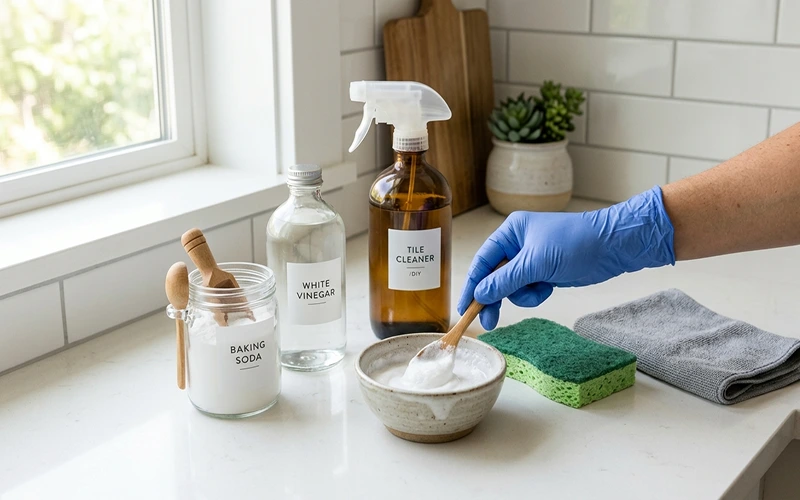
Remedy adjustment based on stains:
- Vinegar spray or baking soda paste for organic stains.
- Use vinegar or mildly acidic solutions to remove hard water stains from tiles.
- Cream of tartar + hydrogen peroxide paste to remove rusty stains.
- Diluted bleach or baking soda paste for grout discoloration.
Pro Tip: If you are planning to use a commercial cleaning product, consider referring to EPA Safer Choice products for safety.
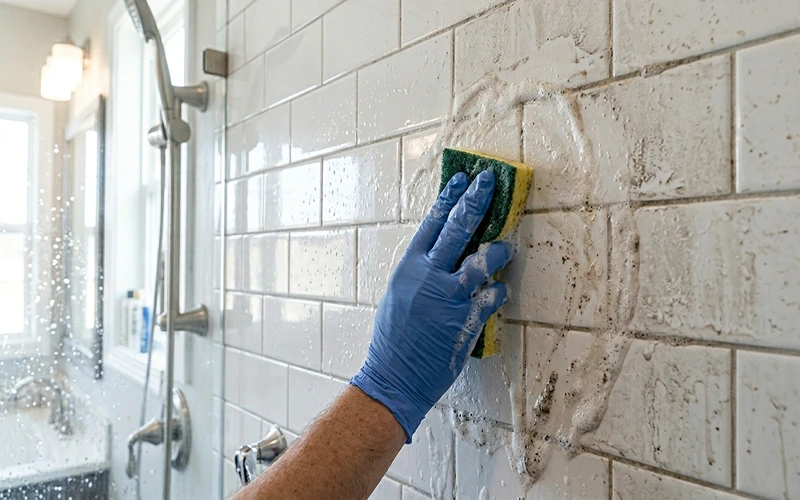
Tip 3. Scrubbing
After pre‑treatment, you will notice that the stain mark has loosened a bit. Scrubbing becomes effective for such soft stain marks. However, using the right tool makes all the difference. Our experts emphasize that you also consider the tile type to prevent any damage to the flooring.
- For stains such as soap scum or mineral deposits, use a stiff brush.
- Soft cloth or sponge to remove stains from polished ceramic or stone.
- An old toothbrush or grout brush for precision cleaning.
Pro Tip: Avoid aggressive scrubbing, as it could put scratch marks on your tile flooring, especially if it’s polished marble, ceramic, or natural stone.
Tip 4. Rinsing
Once you are done scrubbing, rinse the area with clean water to remove every trace of cleaner, residue, streak marks, or solutions that could stick to the surface or react with it, making it more dull.
Here’s how our technicians think you must do it:
- Rinse with clean water, not reused or random cleaning solution.
- Cover the area, rinse the entire section, not just the stain spot, for a thorough finish.
Tip 5. Proper Drying
It’s important to dry the flooring after a thorough rinse to eliminate any lingering moisture, water spots, mineral deposits, or streaks from forming again. Here’s how you can do it:
- Use a microfiber cloth and blot the area until it feels dry.
- Improve ventilation by opening windows or switching on fans. This speeds up drying and prevents mold or mildew growth.
- Finish with vacuuming, our experts believe this helps ensure that no residue remains and the flooring is completely dry.
Signs You Need Professionals to Clean Your Tile Flooring
Now, it’s possible, even with proper execution of DIY methods, that some stains won’t budge. Here are some of the indicators suggesting the need for professional intervention:
- Persistent discoloration: Stains that remain even after vinegar, baking soda, or peroxide treatments often mean minerals or organic buildup have penetrated the tile surface or grout pores. Professionals like us use high‑pressure steam and specialized solutions to restore shine.
- Reappearing stains: Marks coming back even after cleaning, suggesting residue trapped beneath the tile glaze or deep in grout. Our expert cleaning flushes contaminants fully, preventing such recurrence.
- Visible mold or mildew patches: Dark, fuzzy growth or musty odors suggest spores ingrained in grout lines. Our technicians use proper treatments and sealing to contain regrowth.
- Etching or dull finish: Acidic DIY cleaners often leave tiles looking cloudy or scratched. Our team polishes and reseals delicate surfaces, restoring the original look.
- Stubborn rust or metal stains: Reddish‑brown marks near fixtures, resisting household cleaning remedies. We use controlled acidic agents and rinsing systems to lift rust without damaging the tile flooring.
Our team thinks that when you are unsure about the severity of stains, it’s better to connect with experts immediately. The DIY methods have their limitations, and it’s better to use them on your surface in between deep cleaning.
Precautionary Tips to Consider
- Use a damp mop with warm water and mild cleaning solution to lift everyday dirt without dulling the finish.
- Clean spills instantly, as quick action prevents liquids from seeping into grout and leaving permanent stains.
- Use pH‑neutral cleaners, as harsh or acidic solutions can discolor tile and etch natural stone; neutral formulas keep surfaces safe.
- Apply sealer to repel dust, moisture, and stains, extending grout life and keeping it fresh.
- Wipe with microfiber cloths after mopping to prevent water spots and mold growth.
- Follow tile and grout cleaning dos & don’ts to avoid overwetting floors, abrasive scrubbing pads, or mixing strong chemicals.
Let Pros Remove Stains From Your Tile Surface And Restore Its Shine
As we mentioned earlier, no tile surface is immune to stains, but proper care makes all the difference. By knowing how to remove tough stains from tiles, identifying stain types, protecting grout, and combining diy methods with periodic professional cleaning, you can keep floors spotless, finishes shining, and living spaces fresh and safe.
At Tuff Carpet Cleaning, we have a team that is experienced in delivering the best tile and grout cleaning services. With over 35 years of experience, you can expect your tile flooring to be cleaned thoroughly. The team uses powerful industrial-grade tools and organic products to steam clean the floor and remove residues that have gathered over the years.
Give us a call to remove stains from your tiles and make your space lively and welcoming.
Here’s what one of our recent clients, Blake Green, had to say about our services:
“These folks are great. Would recommend their business to anyone looking to have the floor tile cleaned, as it looks as new as the day we had it installed. We have used them twice and will certainly use them again.”
FAQs
How to clean mortar off tile?
⇒ Check whether it’s fresh or hardened, then wipe fresh thinset with a damp sponge; for hardened residue, scrape gently, then soften with vinegar or a mortar dissolver before scrubbing the surface clean.
Will vinegar damage ceramic tile?
⇒ Vinegar is generally safe for cleaning glazed ceramic tile when diluted, but it can damage unglazed ceramic and weaken grout if applied too often. Always rinse thoroughly after use to prevent dulling or etching.
How much does tile and grout cleaning cost?
⇒ Professional tile and grout cleaning usually costs $0.75 to $1.50 per square foot, with small rooms averaging $150 to $300 and larger spaces exceeding the range of $400 to $700. However, sealing grout might raise the price slightly. Contact us to discuss pricing.
What should you not clean tile with?
⇒ Never clean tile with harsh acids, bleach, ammonia, oil‑based soaps, or abrasive scrubbers. These solutions scratch the glaze, dull the shine, and weaken grout extensively. Instead, use a simple pH‑neutral cleaner or mild dish soap diluted in warm water to maintain a spotless floor without damaging grout lines.
How to remove urine stains from tile floor?
⇒ To remove urine stains from tile floors, act fast: blot with paper towels, then clean with an enzyme‑based cleaner or a diluted vinegar solution mixed with warm water. For set‑in stains, scrub gently with a soft brush, and spread baking soda to neutralize lingering odors and dry after